
How to create an Apple ID on your iPhone without entering credit card details
The following tutorial will show you how to create an Apple ID on your iPhone, without entering your credit card details.
1. On your iPhone, open up Safari.

2. Click the two squares that are overlapping in the bottom right.
You will see this:

3. In the navigation bar, go to: http://www.appleid.apple.com/
4. Click the “Create an Apple ID” button below, “Manage your Apple ID”.
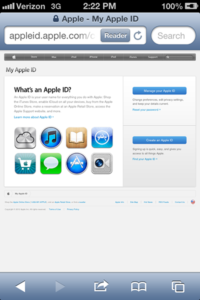
You will see this:
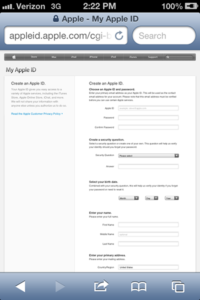
Enter your email, and create a password. Fill out the rest of the forms which include:
- Security Question
- Birth date
- Full Name
- Your home (or primary) address
- Preferred language
- Contact Preferences
- Whether or not you want news and updates sent to you
- Captcha image (to verify you are a human)
- Agreement to Terms & Services
Once you have done that correctly you will need to verify your email address. Go to your inbox and find the corresponding email from Apple. Click the specific link that is included in the email to continue the process of creating your Apple ID. The link will be displayed in the form of text that says “Verify now”.
5. When you get to the verify page, type in the email address you used and the password you set in step four.
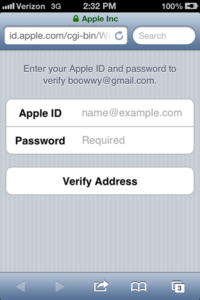
6. If step five is done correctly you will see:

Now this is how you actually use your new Apple ID without having to enter a credit card.
7. Now head to your Settings on your iPhone.
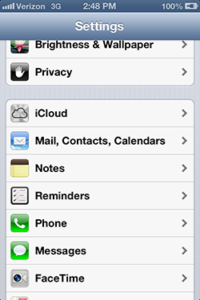
8. Click on iCloud. Do NOT go to iTunes & App Stores. Going to that setting page WILL require you to enter a credit card to use your Apple ID. Going to iCloud does not require a credit card (you can set it as: None) and then you can still use the App Store to download free apps.
9. Enter your newly made Apple ID & Password and click ‘Sign In’.
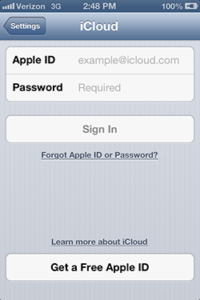
10. You will then see this:
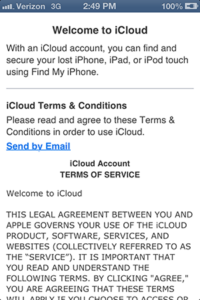
11. Scroll to the bottom and press “Agree”, then “Agree” again on the pop up that confirms your agreement for a second time.
12. You will then be asked if you want to Merge with iCloud. I selected ‘Merge’ which means that my contacts, reminders, and Safari data is accessible to any other iDevice that I connect to my newly made Apple ID’s iCloud feature.
13. You will then be asked if you’d like to allow your Apple ID to be connected to your current location (wherever you are walking, standing, etc).
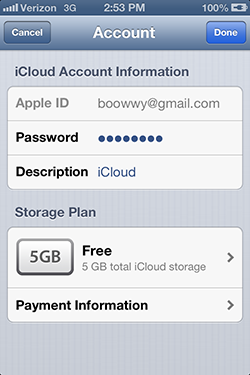
14. Okay now in ‘iCloud’ click your Account.

15. You will see ‘Payment Information >’ at the bottom. Select it then enter your Apple ID and password.
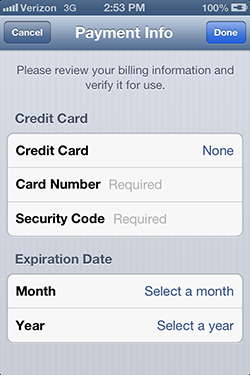
16. You will be asked to review your billing information so you can verify your Apple ID for use. The default setting is ‘None’ for credit card. Please note that choosing this option is only available through iCloud account settings and is the only way to use your Apple ID in the app store without using a credit card.
Scroll down and enter your title (Mr., Ms., etc).
Then enter your phone number in the appropriate field.
These are the only two fields you actually have to enter anything into / alter.
Click ‘Done’ (blue button).
17. To make sure it all works, head to the App Store (it’s located in your iPhone’s main page area where all your other apps are as well). Go find a free app (says ‘Free). Click it and then click ‘Install’. You will then be told to improve Apple’s security by choosing three security questions. This is required.
18. After inserting information / questions for account security your app will begin to download. If it does not start downloading, just choose to install the app again and it’ll begin even though you don’t have a credit card (obviously apps that cost money require a connected credit card)!
And that my friends, is how you create an Apple ID without having to use a credit card, all while on your iPhone!
Related Posts

How to fix shadow at the edges of an iPhone/iPad screen →

Fixing “X-apple-AMD-action_message” after upgrading to iOS 8.4 on iPhone and iPad →

Sharing PDFs and Books From iBooks →